


How to Install Cloudwheels on Your Electric Skateboard
A step-by-step guide with video tutorials

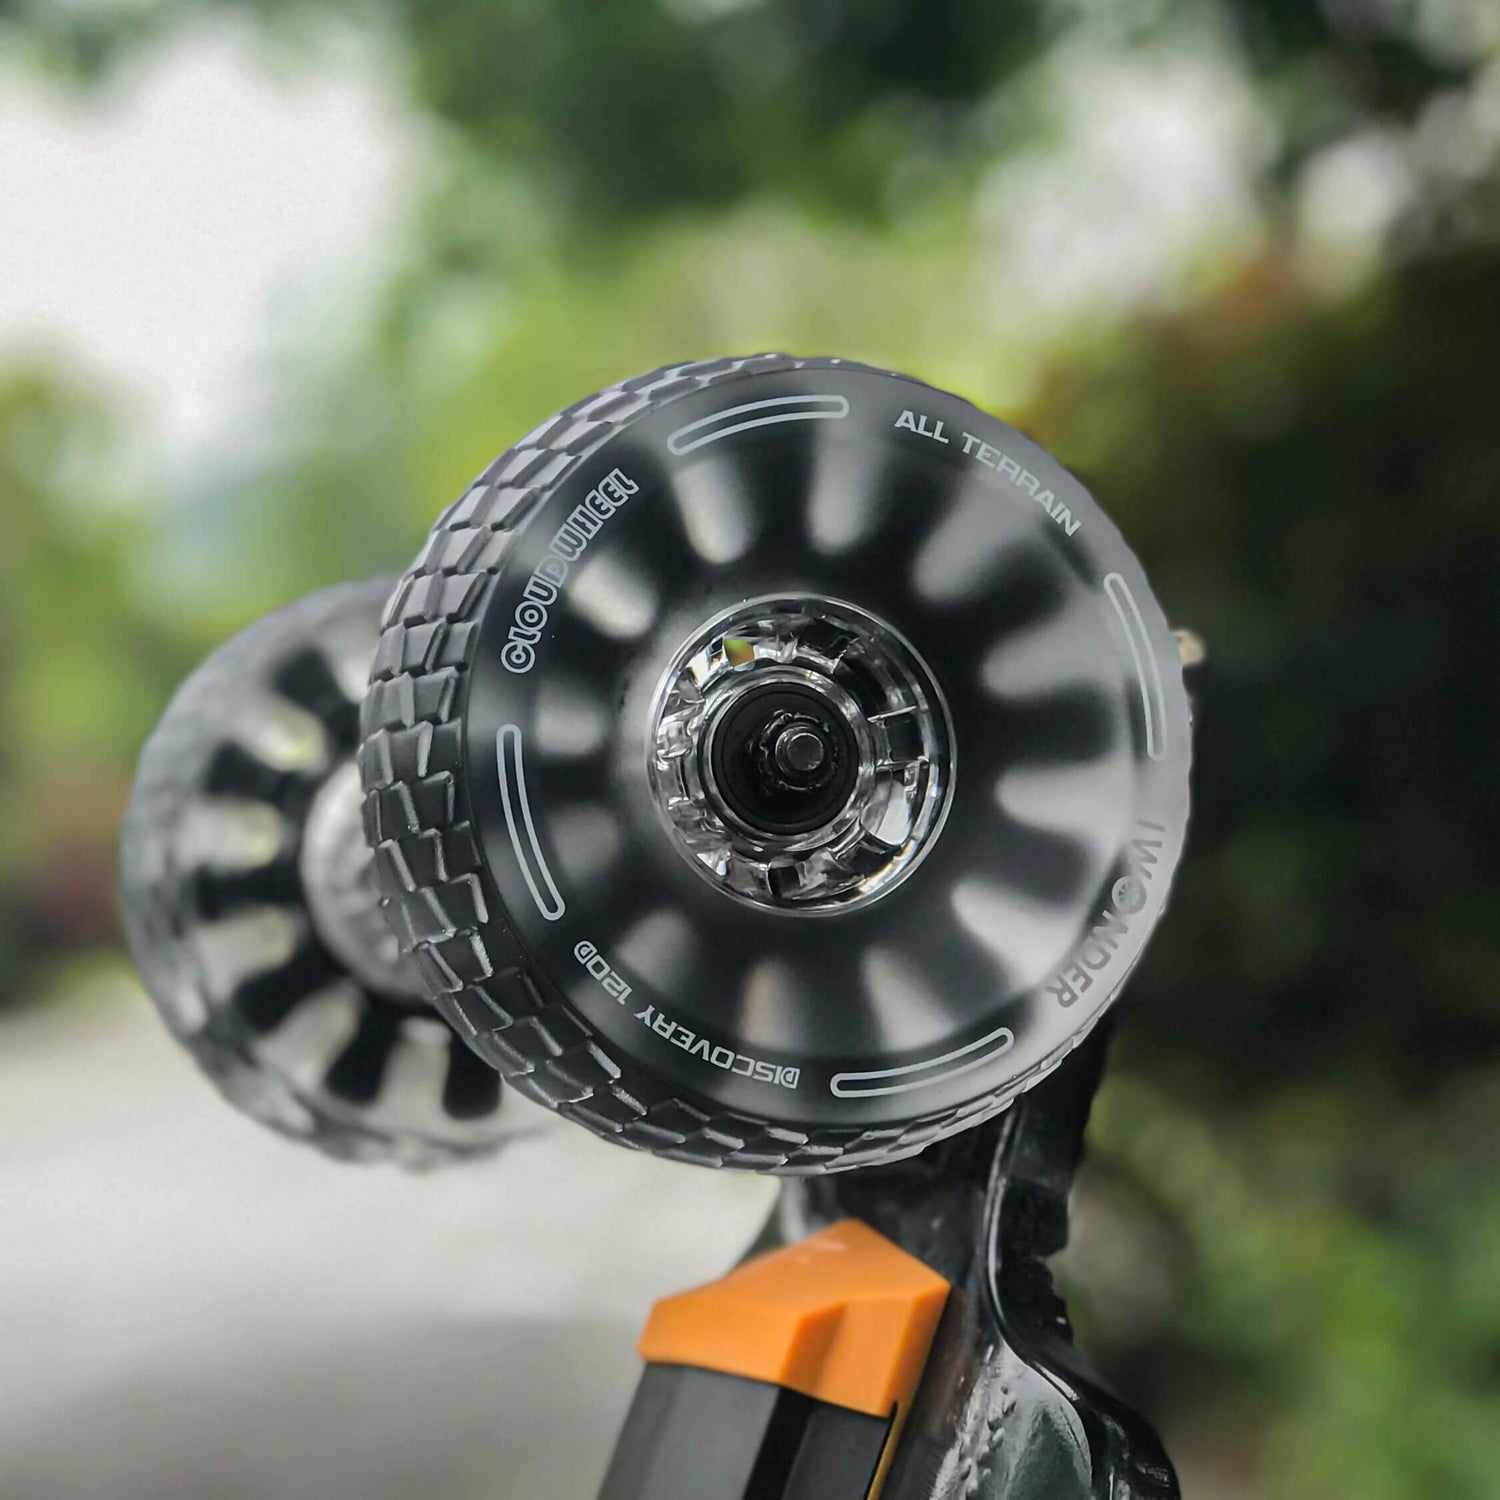
Upgrading to Cloudwheels is one of the easiest ways to improve the comfort and versatility of your electric skateboard. Compared with traditional PU wheels, Cloudwheels absorb more vibration and handle rough pavement better, making them a popular upgrade for city riders.
In this guide, we’ll show you how to install Cloudwheels step by step, along with quick video tutorials to make the process simple.
Video Tutorial
Follow the installation process in the videos below.
Tools You'll Need
- Skate tool or wrench
- Clean cloth
- Cloudwheels set
- Bearings and spacers
The installation only requires basic tools and takes just a few minutes.
Step-by-Step Installation
1. Remove the Original Wheels
Use a skate tool or wrench to loosen the wheel nut and remove the original wheel.

2. Transfer Bearings and Spacers
If needed, move the bearings and spacers from the original wheels into the Cloudwheels.

3. Install the Cloudwheels
Slide the Cloudwheel onto the axle and ensure the bearings sit evenly.

4. Tighten the Wheel Nut
Tighten the wheel nut until secure while ensuring the wheel spins freely.

5. Check Alignment
Spin the wheel by hand to confirm smooth rotation and proper installation.
Why Riders Choose Cloudwheels
- Better shock absorption for rough roads
- More comfortable city riding
- Improved ride confidence

Compatible Boards
- Exway Wave

- Exway Flex

- Exway Atlas

Final Tips Before Riding
- Double-check wheel nuts
- Ensure bearings are seated properly
- Start with a slow test ride
Upgrade Your Ride
Cloudwheels are one of the most popular upgrades for electric skateboard riders who want a smoother ride on real-world roads.


